
そろそろ気になるPHP8
どうも、やまもとやまです。
とうとうRHEL9もリリースされてしまった今日この頃。RHEL8でもApplication StreamsでPHP8が提供開始されましたね。
とはいえ、まだまだ CentOS7が現役で利用されている環境もあるのではないでしょうか。
そんなCentOS7ですが、標準のPHPは5.4と古く、Software Collections提供のものを利用した場合でもPHP7.3までとなります。
一方でPHP公式ではPHP7.3はすでにサポート終了、PHP7.4も2022年11月には終了となり、PHP8の利用も今後増えていくことになるのかも・・・。
というわけで、PHP8をソースインストールして試してみました。
環境
CentOS7を最小インストールし、開発ツールとwgetのみ追加インストールした環境を利用します。
※標準レポジトリに追加でepelも設定
インストール!
それでは早速インストールしていきましょう。
簡単のため、今回はすべてrootユーザでの作業とします。
まずはPHP公式からソースをダウンロードして展開します。
# cd /usr/local/src
# wget https://www.php.net/distributions/php-8.1.10.tar.gz
# tar xzf php-8.1.10.tar.gz
# cd php-8.1.10
続いてconfigureを。
# ./configure --prefix=/usr/local/php-8.1.10さて早速ライブラリ不足で怒られましたので、必要パッケージを追加します。そしてビルド。
# yum install libxml2-devel libsqlite3x-devel
# ./configure --prefix=/usr/local/php-8.1.10
# make
(中略)
Generating phar.php
Generating phar.phar
PEAR package PHP_Archive not installed: generated phar will require PHP's phar extension be enabled.
directorytreeiterator.inc
clicommand.inc
directorygraphiterator.inc
phar.inc
invertedregexiterator.inc
pharcommand.inc

Build complete.
Don't forget to run 'make test'.
おや。何度かエラーでも出るかと思いきや、あっけなく完了しました。
ではインストール!
# make install
Installing shared extensions: /usr/local/php-8.1.10/lib/php/extensions/no-debug-non-zts-20210902/
Installing PHP CLI binary: /usr/local/php-8.1.10/bin/
Installing PHP CLI man page: /usr/local/php-8.1.10/php/man/man1/
Installing phpdbg binary: /usr/local/php-8.1.10/bin/
Installing phpdbg man page: /usr/local/php-8.1.10/php/man/man1/
Installing PHP CGI binary: /usr/local/php-8.1.10/bin/
Installing PHP CGI man page: /usr/local/php-8.1.10/php/man/man1/
Installing build environment: /usr/local/php-8.1.10/lib/php/build/
Installing header files: /usr/local/php-8.1.10/include/php/
Installing helper programs: /usr/local/php-8.1.10/bin/
program: phpize
program: php-config
Installing man pages: /usr/local/php-8.1.10/php/man/man1/
page: phpize.1
page: php-config.1
/usr/local/src/php-8.1.10/build/shtool install -c ext/phar/phar.phar /usr/local/php-8.1.10/bin/phar.phar
ln -s -f phar.phar /usr/local/php-8.1.10/bin/phar
Installing PDO headers: /usr/local/php-8.1.10/include/php/ext/pdo/
後々のため、シンボリックリンクも張っておきます。そしてとりあえず実行。
# ln -s /usr/local/php-8.1.10 /usr/local/php8
# /usr/local/php8/bin/php-cgi -v
PHP 8.1.10 (cgi-fcgi) (built: Sep 5 2022 19:54:56)
Copyright (c) The PHP Group
Zend Engine v4.1.10, Copyright (c) Zend Technologies
うん。無事インストールできたようです。
コマンドラインだけでは無味乾燥なので、Apache経由で実行して表示してみましょう。
細かい設定は面倒なのでさておき、今回はシンプルなCGIでいいかな・・・。
最小インストールでApacheすら入っていない状態なので、yumで入れてあげましょう。
Apache設定はドキュメントルートのAllowOverrideだけ設定変更しておきます。
# yum install httpd
# vi /etc/httpd/conf/httpd.conf
----------------------------------------------------------------------
@@ -148,7 +148,7 @@
# It can be "All", "None", or any combination of the keywords:
# Options FileInfo AuthConfig Limit
#
- AllowOverride None
+ AllowOverride All

#
# Controls who can get stuff from this server.
----------------------------------------------------------------------

# systemctl start httpd
続いて、PHPのCGI用ラッパースクリプトを作成。
# vi /var/www/cgi-bin/php-wrapper
----------------------------------------------------------------------
#!/bin/bash
exec /usr/local/php8/bin/php-cgi
----------------------------------------------------------------------

# chmod 755 /var/www/cgi-bin/php-wrapper
# chown apache:apache /var/www/cgi-bin/php-wrapper
あとは.htaccessで指定してあげればCGI動作するはずです。
# vi /var/www/html/.htaccess
----------------------------------------------------------------------
DirectoryIndex index.php index.html

Action php-script /cgi-bin/php-wrapper
<filesMatch "\.php$">
SetHandler php-script
</filesMatch>
----------------------------------------------------------------------

# vi /var/www/html/info.php
----------------------------------------------------------------------
<?php
phpinfo();
----------------------------------------------------------------------
では、ブラウザから表示させてみましょう。
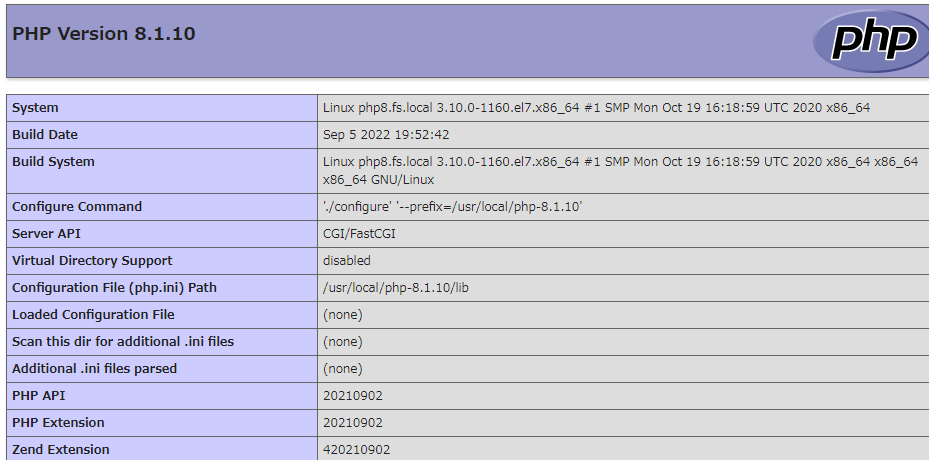 無事PHPINFOが表示されました。めでたしめでたし!
・・・ただしこれ、configureがデフォルト設定のため、モジュールが少ないです。流石に少なすぎます。
というわけで、それなりに使われそうなモジュールをオプション追加して再ビルド。
必要ライブラリをあらかじめインストール後、オプションを追加してconfigure実行します。
# yum install openssl-devel bzip2-devel libcurl-devel enchant-devel libpng-devel gmp-devel libicu-devel oniguruma-devel postgresql-devel aspell-devel readline-devel net-snmp-devel libxslt-devel libzip-devel
# cd /usr/local/src/php-8.1.10
# make clean
# ./configure --prefix=/usr/local/php-8.1.10-2 \
--enable-bcmath \
--with-bz2 \
--enable-calendar \
--with-curl \
--enable-dba \
--with-enchant \
--enable-exif \
--enable-ftp \
--enable-gd \
--with-gettext \
--with-gmp \
--enable-intl \
--enable-mbstring \
--with-mysqli \
--with-pdo-mysql \
--with-openssl \
--enable-pcntl \
--with-pdo-pgsql \
--with-pspell \
--with-readline \
--enable-shmop \
--with-snmp \
--enable-soap \
--enable-sockets \
--enable-sysvmsg \
--enable-sysvsem \
--enable-sysvshm \
--with-xsl \
--with-zip \
--with-zlib
おおっと、ここでエラー。
「Requested 'libzip >= 0.11' but version of libzip is 0.10.1」とのことで、CentOS7のパッケージで入るlibzipのバージョンが古いとお怒りです。
zipモジュールは入れておきたいところなので、ソースからインストールすることにします。
cmake3が必要になるのであわせて導入。
# cd /usr/local/src
# wget https://libzip.org/download/libzip-1.8.0.tar.gz --no-check-certificate
# tar xfz libzip-1.8.0.tar.gz
# cd libzip-1.8.0
# yum install cmake3
# cmake3 -DCMAKE_INSTALL_PREFIX=/usr/local/libzip-1.8.0
# make
# make install
# ln -s /usr/local/libzip-1.8.0 /usr/local/libzip
では気を取り直して、再度PHPのconfigure。
libzipのライブラリ指定のため、LIBZIP_CFLAGSとLIBZIP_LIBSを指定してやります。
# cd /usr/local/src/php-8.1.10
# ./configure --prefix=/usr/local/php-8.1.10-2 \
--enable-bcmath \
--with-bz2 \
--enable-calendar \
--with-curl \
--enable-dba \
--with-enchant \
--enable-exif \
--enable-ftp \
--enable-gd \
--with-gettext \
--with-gmp \
--enable-intl \
--enable-mbstring \
--with-mysqli \
--with-pdo-mysql \
--with-mysql-sock \
--with-openssl \
--enable-pcntl \
--with-pdo-pgsql \
--with-pspell \
--with-readline \
--enable-shmop \
--with-snmp \
--enable-soap \
--enable-sockets \
--enable-sysvmsg \
--enable-sysvsem \
--enable-sysvshm \
--with-xsl \
--with-zip \
--with-zlib \
LIBZIP_CFLAGS="-I/usr/local/libzip/include" \
LIBZIP_LIBS="-L/usr/local/libzip/lib64 -lzip"
今回は無事configure通りました。さてビルドビルド、、
# make
(中略)
/usr/local/src/php-8.1.10/ext/zip/zip_stream.c:63: undefined reference to `zip_error_strerror'
/usr/local/src/php-8.1.10/ext/zip/zip_stream.c:64: undefined reference to `zip_error_fini'
collect2: error: ld returned 1 exit status
make: *** [sapi/cli/php] Error 1
あれー?変なエラーがでますね??
調べてみると、どうやらパッケージインストールされたlibzipのライブラリがあると変に競合してエラーになるバグのようです。仕方ないので削除して改めてビルド。
# yum remove libzip libzip-devel
# make
無事成功したので今度こそインストール!!
シンボリックリンクも差し替えましょう。
# make install
# rm -f /usr/local/php8; ln -s /usr/local/php-8.1.10-2 /usr/local/php8
表示は省略しますが、改めてPHPINFOを表示すると各ライブラリも利用可能になっています。これでまともに使えるPHP8になりました。
せっかくなので、MariaDBも入れてWordPressを動かしてみます。
# yum install mariadb-server
# systemctl start mariadb
# mysql_secure_installation
# mysql
MariaDB [(none)]> create database wpdb character set utf8;
MariaDB [(none)]> create user 'wpuser'@'localhost' identified by 'Hedn7d$F';
MariaDB [(none)]> grant all privileges on wpdb.* to 'wpuser'@'localhost';
MariaDB [(none)]> flush privileges;

# cd /var/www/html
# wget https://ja.wordpress.org/latest-ja.tar.gz
# tar xzf latest-ja.tar.gz
# chown -R apache:apache wordpress
ぽんぽんっと。
データベース初期設定とユーザ、DB作成してWordPressダウンロード。
あとはWebからアクセスしてぽんぽこぽーんと必要項目入力してやると無事動きました。ばんざい。
(pcre.jitでWarningでたのでそこだけphp.ini設定変更してますごめんなさい)
というわけで
CentOS7に無事2022/9時点の最新PHPをインストールすることができました。
何点かつまずく部分はあるものの、CentOS7の古めのライブラリでも大きな問題はなく導入が可能のようです。
これがさらに古い、例えばCentOS5あたりだと結構苦労しそうな予感はしますね。さらに古いとどうなるか。。面白そうなのでぜひ誰か試してみてください。
それではまた!
